
Of course, for the first month or so, I diligently looked for a shade anytime I was out of the house. Unfortunately, I never had the foresight to bring the lamp with me, so whenever I found one I thought might be good, I was inevitably too scared to commit to it, and like all meaningful projects, it soon slipped out of my mind and the lamp was abandoned.

fabric cords rock! er, I mean, shock!
When I finally noticed that the wiring was so ancient it actually scared me to plug it in, I added that to my list of 'easy' fixes the lamp needed. But I really didn't know where to start with that task, and again the whole project was abandoned.
This poor lamp has been left sitting around, collecting dust, getting moved from house to house and corner to corner for 15 years (and that's a conservative estimate).
As it endured three moves before, it endured our Christmas move, and as I unpacked it from a box, I thought that this would be a good place to start when it came to my resolutions this year. If I love it as much as I think I do, I should treat it as such. So for the last two weeks, I've been working on it.

I picked up this complete make-a-lamp kit at Home Depot for around $17. Honestly, the price kind of surprised me, but when I looked at the parts sold individually, I thought it was a better deal especially since I really wasn't sure exactly what parts I needed.
I don't feel like I have to say it, but then there're warnings on blind cords these days. So, you know, if you are rewiring a lamp, please make sure to unplug it from the electrical outlet. Be safe. Use your brain.

I took the old socket off by simply cutting the cord with a wire cutter. All the old cording pulls right out of the lamp and since my socket was already off, I didn't have to worry about unscrewing it.

I screwed the bottom of the socket shell onto the top of the lamp stem. Then, I threaded the wire up from the base through the stem and through the bottom of the socket shell. Now I could start wiring.
The only thing in the instructions that took me a while to understand was the part about tying a knot in the wire. At first, I thought they meant tying a knot in the whole wire, but that wouldn't fit in the base of the socket shell. Finally, I realized I had to split the main wire into two pieces a bit more (it's already partially done for you), and then tie those two individual pieces together. Like above.

No plan of mine is ever without some screw up, and I wished I had caught it at this point, but I didn't, so even though the actual directions didn't say to do it but the pictures showed it, I totally missed the step where you put the harp holder on.
So I wired the socket, clipped the top shell on and happily went in search of a light bulb so I could test it. When I got back, I realized I hadn't put the harp holder on and there's literally no way to get it on without taking the socket off. Bummer.
If you do what I did, you'll angrily try to pull the top shell off the socket for 20 minutes and even test some ideas out on the old socket, almost resigning yourself to having to cut the wire, buy another kit, and start from square one. To the internet!

So you see up there? There's a spot on the top shell that says, PRESS, and the internet (including Martha Stewart) said all I had to do was press there and they'll come straight apart. Or will they? I pressed so hard, my thumbs actually bruised and were sore for two days. I pressed the whole thing up against the edge of the desk. Nothing. I pressed and pulled and twisted and cried and finally, I managed to get it off using some adjustable pliers to squeeze right where the PRESS is imprinted and off it came. So easily, too, like, I have no idea what you've been fussing about for a whole hour. It should say SQUEEZE with the force of 10 men and some pliers, but I suppose they only have room for PRESS.

After dismantling all my wiring, I put on the harp holder, wired the socket again, and reattached the top shell. If you remembered to put the holder on at the beginning of the project, all you really have to do is make sure the ridged wire (you can feel the difference between the two very easily) is attached to the silver terminal screw and that's all. Screw the other wire onto the gold screw, pull it down into the socket shell, push on the top shell until it clicks in snuggly, and you're done. It honestly doesn't take more than 5 minutes, it's really easy.
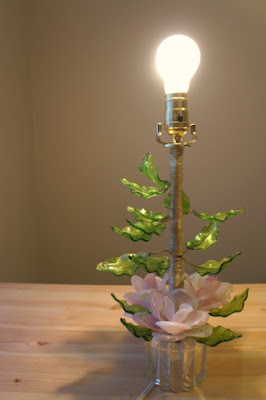
Lastly, screw in the bulb, plug in the cord, and voila! We have light! It's really that simple. Aside from the harp issue and the cord knotting instructions, the kit is pretty straight forward. Once you master this, you can make a lamp out of anything your little heart desires. It's not just for rewiring old lamps, you can take your favourite vase and make it into a lamp or if you have a lamp that's on the fritz (I have another one that needs a new cord, actually), you'll easily be able to fix any of the basic parts.
To learn how to choose the perfect lampshade read: Rewiring and fixing a vintage lamp part 2
3 comments:
LOVE! Ooooh that lamp is stunning.
Thanks for the tutorial,I'll be scouring
flea markets and yard sales from now on:)
Good! Just because it doesn't work in the shop doesn't mean you can't make it work! =)
Great idea!
Post a Comment