Wednesday, May 18, 2011

homemade bubble tea


I made bubble tea! And it's so easy, I'm telling you!


All you have to do is buy some tapioca pearls (available at your nearest asian grocery), some straws (I found mine at Bed Bath & Beyond), some tea (available everywhere; in every flavour imaginable), some milk and sweetener and ta da! A treat beverage! A 'bevreat' as I like to call it (cuz I'm always ridiculously combining words. I'm weird like that).


Of course, I'll still be indulging in delicious Dream Tea House mixes when I'm in WEM (my favourite is barley germ). But, believe it or not, there are days when I actually don't want to drive 30 minutes to get a drink. Mind blowing, I know. Now when I'm craving a chewy addition to my usual beverage, I'm going to make it myself. Because I can... and you can, too.


Cooking the tapioca is easy and doesn't take very long, so I suggest it be the last ingredient you prepare. It is gross the day after cooking. It goes mealy and loses all of its jelly je ne sais quois. You can add a little boiling water (which works great) or zap them in the microwave for a few seconds to rejuvenate them, but it's easier to cook only as much as you need.

my favourite way to do it
based on these sources then refined so there's not as much damn work involved for one drink

{cold brew tea}
any flavour is good; I prefer black

You can read my post on how I make this right here or you can brew up some tea regular style and allow it to chill.

I don't fuss around with simple syrups and sweetened condensed milk. I just sweeten the entire jug of tea as if I were going to drink it without milk and tapioca. I was fair about it, though. I tried both and while both are delicious (you know, cuz they're sugar), I eventually decided I just didn't want to bother with them. They added pressure to my life by sitting there in the fridge, half used, screaming at me to have one bubble tea drink a day to use them up. And I don't like it when sweeteners yell at me. So naturally, you know what I'm going to say here: use what you like and sweeten it to your tastes. That's really all that matters.

{tapioca balls}
follow the directions on the package you use. The above brand specifies 1 cup of pearls and 10 cups of water for 4-6 servings
I did the math for you so you can make enough for 1-2 servings (depending on glass size)

2 1/2 cups water
1/4 cup tapioca pearls

Bring the water to a boil. Add the tapioca and gently stir until they soften and start to float. Lower the heat to medium, cover, and let cook for 5 minutes. Drain the water and allow to cool slightly.

{assembly}

Place the cooked tapioca pearls in the bottom of a glass (the pearls should take up about a quarter of the cup). Add your tea and top it off with milk. A good place to start is a 1:1 ratio tea to milk, but I've come to prefer about half that amount of milk.

Monday, May 16, 2011

DIY project: "quick" and easy t-shirt bag

I have a lot of reusable shopping bags, but I don't have enough cool, interesting, unique ones, so in comes the t-shirt shopping bag!

I spotted this video eons ago and since then, I've seen many other t-shirt bag tutorials pop up, but the video continues to be my favourite example. It seems to be the simplest and most straight forward to follow.


I used my super old Beastie Boys shirt I found at the thrift store years ago. So it was already used when I got it, then I wore it for a couple years, then I retired it to pajama status, and then, when it developed crazy armpit holes (like, how does that even happen?), it got scrunched in a bag with other scraps of fabric.

I totally forgot I even had it and found it in that scrap bag completely by accident while looking for other scraps (for another project, of course). I thought now would be the perfect time to scratch the t-shirt bag off my list since I finally had the perfect t-shirt for the job. How's that for a great recycling story?

And when I remembered that the Beastie Boys had just released a new album, it was almost as if finding the t-shirt again was meant to be. So turn on some Beastie Boys and get to work!


Fold the t-shirt in half, making sure to align the sleeves.


With some sharp scissors, cut off the sleeves and the neck to form the handles. I had to cut my sleeves off a little lower due to the holes in the armpits, but it would have been much better to aim for cutting only the sleeve portion off with as little of the body fabric as possible. Look at it this way, the less fabric you cut off the sleeves, the larger your bag will be and the more in proportion your handles.

You have to use your judgement for where to cut off the neck portion. If you don't mind cutting through whatever print is on the shirt (if yours has one), then go right ahead. Or you can cut it just above the print like I did.


Next, turn the t-shirt inside out and do a straight stitch along the bottom to close it. Then stick your hand in one of the corners and form a triangle and sew that. Do this on both corners.

The triangle thing is kind of tricky and I wish I could better describe it now that I've done it. It's best to watch the video a couple times. But don't sweat it too much. Just figure it out best you can. I looked at the bag without the triangles, too, and you could really skip that part if you're a little uncomfortable with it. The bag will still be a bag.


Now's the part where I explain why this was a "quick" project for me. I don't know why, but any time I have to use my sewing machine, I'm almost guaranteed to either have just enough thread on the bobbin to make me think I can get the whole job done or something happens to the bobbin thread which causes it not to be picked up or gets it stuck and knotted so it doesn't want to work. Both happened on this project. So when I was trying to stitch up the last triangle (something that should take about 2 seconds), I had to readjust the bobbin, then readjust again, then take the last little bit of thread off of it and rethread it, and adjust a couple more times before I could run that 2 seconds of stitch along the corner. Sigh.


Now turn the t-shirt right side out, and you've got a really sweet shopping bag! I've been keeping it folded up in my purse for spur-of-the-moment purchases. The last thing I had in it was a couple of 2 L bottles of pop and aside from some stretching (since the fabric is stretchy), it handled the load perfectly.

And while we're also talking about the Beastie Boys, I listened to their new album when it was streaming for free and it sounds a lot like Hello Nasty to me, so I really liked it. Unfortunately it's not streaming anymore, but they do have a really interesting video up now (fyi it's nsfw). I thought it was going to be some kind of documentary type of revist and then suddenly, it turned into one of those "which famous person am I going to see next" kind of games and I couldn't turn it off. I know 29 minutes is long in internet terms, but if you have time, it's fairly amusing. (Will Ferrell -- cow bell. Need I say more?)

the entire diy list is here

Friday, May 13, 2011

friday fixations


{popcorn popping} I'm completely fixated on making popcorn lately, so I guess it makes sense that I'm drawn to this video. It looks as if this popcorn kernel is jumping for joy, doesn't it?

{cinemagraphs} You know how much I love gifs, right? Well, From Me To You has the most amazing gifs ever. Like, better than anything I've ever seen. I keep slowly scrolling through her blog staring at every photo searching for a hint of movement. When I find one, I stare at for far too long. Who would have ever thought that a skirt blowing in the breeze could be so captivating. Here's one of my favourites; although, honestly, I really love them all.

{mystery photographer} These are so inspiring and the black and white is (as usual) perfect.

{lost} Ok so we're a little late to this party, but for those of you who watched it on tv as it happened, HOW THE HELL DID YOU MANAGE?! It would have been agonizing! The commercials, THE WEEK-LONG BREAK BETWEEN SHOWS! I'm SO glad neither of us got into it when it first aired. This is the type of series that's better left to DVDs because you'll blow through a whole disc every. single. day.

{the danny/gwyneth project} This is the same idea as Julie and Julia only far more entertaining and snarky. Danny's cooking his way through Gwyneth Paltrow's new cookbook, My Father's Daughter and he's not shy when it comes to expressing how he feels about it.


{the future} The strange is always more appealing, isn't it? I would like very much to see this.
"Can I take your coat?"
"It's, um, kinda part of my... outfit..."
Totally been there.

DIY project: pop-up flower card


I stumbled this neat video and I couldn't get it out of my mind. Send this cutesy card to anyone. For any reason. They'll be happy. I promise.

start with a sheet of printer paper

fold in half


take one of the halves

and fold it in half

fold it in half again

fold a triangle at the corner on both sides


do this six more times

Marked petal 1 and 2 get stacked on the first and last petals of the base flower. 3 gets stacked on top of all of those. Then petals 4 and 5 are stacked similarly to the first bunch on top of 3. 6 goes on top of everything to finish
(this part's a little tricky, so refer to the video if you need visual help)

hopefully, you'll end up with something that looks like this

grab another sheet of paper for the card portion


make sure your glue has dried before trying to open it!

{the ever expanding DIY list is here}

Monday, May 9, 2011

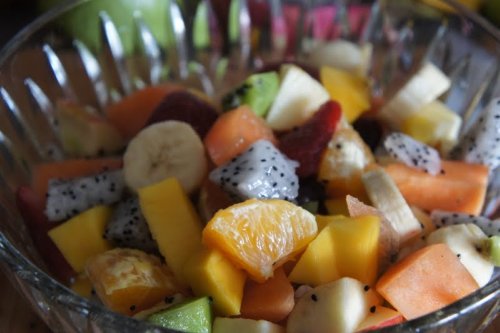
fruit salad


I was so excited to try the guava, but unfortunately, it wasn't ripe enough yet.