Showing posts with label idle husband. Show all posts

Monday, January 27, 2014

diy: love lock


This year, we had our anniversary in a new country. And, after getting rid of all our possessions, I didn't really want to start collecting things again unless they were things of need or importance. So naturally, I decided that an experience or memory gift would be in order.

While doing my research on Finland, I came across this concept of love locks. I'm sure you've heard of them before, but if you haven't, the basic idea behind them is this. Couples purchase a lock on which they can engrave something personal (usually their initials and the year). They then lock the lock onto a bridge (there are a lot of acceptable bridges in many different countries and cities) and throw the key into the water symbolizing that their bond is forever and unbreakable.

I immediately thought this would be the perfect gift. What better way to commemorate both our anniversary and our move to Finland? Especially since there's a bridge in Helsinki that already has locks on it. (When we decided to put the lock on one of the bridges close to our new apartment instead, we were pleasantly surprised to find it already had a few love locks on it, so it was almost like fate!)

Since I had to carry out this craft in a country where I had no idea what stores were for what things, I had to do this kind of ghetto. So I'm giving you palsy pictures from my iphone (I couldn't charge my proper camera at the beginning because I was worried about voltage issues) and I had no supplies or knowledge of where to get anything at the time (since I actually made and gifted my lock back in December, about 2 1/2 weeks after we first landed in Helsinki).

Had we been in Canada, I would have done one thing differently. I would have spent the time and money to get the lock professionally engraved (like that super sweet pink lock above). This requires only a simple trip to a jewelry store. As it was, I did the best I could scratching in the initials myself with a screw I found in our first apartment (I told you it was ghetto!). The scratching will definitely be there long after the ink rubs off, but it's just not as nice as I would have liked it to be (although what's on the lock and how it looks is completely minor in comparison to the sentiment involved, so it really doesn't matter in the long run). But if there's one thing I would suggest you do differently from me, it would be that one step.

The rest is pretty easy and mostly for presentation.

What you need:

One padlock
nail polish (optional)
ribbon, string, or pretty washi tape (optional)

What you need to do:

Engrave or scratch you and your loved one's initials into the lock along with anything else that's significant. First date, wedding date, anniversary date, etc. Pretty much whatever floats your heart boat.

I wanted to dress the key up, so I painted it red with a little nail polish. I didn't have a single stashed craft supply save for my sharpies and my washi tape (there's no way I was going to leave those behind!), so I wrote over my scratchings with a sharpie so they'd be easier to see (for presentation) and I pushed a piece of washi tape through the key's hole as a cute fob and I put another little flag on the lock shank. This is all completely optional. Remember, you're going to be locking the padlock on a public bridge and throwing the key into the water so it's really not necessary that you dress it up. I just thought it added a little bit of romance and colour to the present rather than giving my ghetto scratched padlock on its own.

Next is completely up to you and your loved one. Pick the bridge that's significant to you and go lock it on there (don't forget to throw away the key). Tears galore!

Wednesday, July 10, 2013

freshly squeezed lemonade


Have you ever had a cold in the summertime? Thanks to mom (I've got to rub it in), I am currently experiencing my first summer cough and cold. 

It's wonderful.

When the weather is 25, I'm in the midst of a sweating fever. When it's raining, I'm in the house freezing under a pile of blankets. And while all my instincts keep telling me to eat soup and drink hot liquids, I just can't. 

I won't. It's summer. The fever's bad enough without also having to endure the heat of outside with a mug of hot lemon juice and honey in my hands.

That's when I decided to make lemonade. That's got the benefits of hot water with lemon and honey, right?


Plus mom gave me? lent me? her super amazing juicer so why not put it to good use?

You don't necessarily have to own a juicer, but it helps if you drink a lot of juice. I do have one of those glass hand reamers that will definitely do the job if you're a casual citrus drinker. But now that we're both sick, we've been going through a lot of lemons and I really couldn't imagine juicing them all by hand. That said, the effort is still totally worth it (hey, there's still some effort for me! I've got to cut up all the lemons and clean the machine's parts after!). There's just something that makes freshly squeezed juice so much better than store-bought. I don't know what it is, but you really can taste the difference. Plus there's pulp. Mmmm pulp...

makes about 2 1/2 L

1 3/4 cups of white sugar
1 1/2 cups lemon juice
8 cups of water

To make things even easier, I boil water in my tea kettle and use that to make a simple syrup instead of boiling it in a pot on the stove. It IS summer, after all, and I don't really want to turn the stove on unless I have to.

Once the water's boiled, add 1 cup of the boiling water to the sugar and stir until dissolved to make the simple syrup. If it doesn't all dissolve, you can add more water if you want, just keep track of the amount you use. I don't wait for this to cool, but you can.

To a pitcher, add the lemon juice, the 7 remaining cups of water, and the simple syrup. Enjoy right now (it'll be about room temperature if you didn't cool the syrup) or cool in the fridge and enjoy once sufficiently chilled for your tastes.

{note} To make this more cough-friendly, I like to substitute the white sugar for honey. In my sicky mix, I only use about a cup of honey which produces a very tart but very accurate representation of what I usually drink for a sore throat (hot water, lemon juice, and a teaspoon or two of honey).

{interesting} I've also made a sugar-free version using equal amounts of Splenda in place of the white sugar. You don't have to go through the motions of boiling water for this version, just dump everything together and mix. Just be aware that it takes a couple hours of stewing for the Splenda to sweeten the lemonade appropriately.

{good to know} I usually grab about 6 lemons and juice them all at once. This nets me about 2 1/2 - 3 cups of lemon juice. So 6 lemons will make about two pitchers of lemonade.

Wednesday, February 6, 2013

early fixation: benji hughes

A dumb thing happened to me last week. I lost the diy I had planned for today. I don't know where I put it or what could possibly have happened to it, but I've turned the house upside-down and I still can't find it. I think some little house gnome has got it and he's not giving it back.

Instead, I thought I'd tell you about Benji Hughes' album 'A Love Extreme.'

The thing with me and music is that I'm usually drawn to sounds that reflect what I'm feeling or what's going on in my life (even if that just means I was really digging anything with hand claps in it at the time). So usually, I can listen back on certain CDs and singles and remember the events surrounding that particular song and I can remember what it was I was feeling or what I was doing back then.

It's been kind of a slow music month for me, so I loaded some older CDs onto my iPod and 'A Love Extreme' was one of them.

It was probably one of the last physical CDs I've ever purchased, but I remember when I purchased it, back when I first met Idle Husband. So a lot of the songs remind me of that time. The crazy fun, the excitement, the newness, the love extreme. 

So if you're looking for a CD that's got some sort of a Valentine slant to it but is nowhere near that crazy Mariah Carey or Whitney Houston type of love song ballad, then I think you're looking for Benji Hughes. His is about the closest approximation to lovey romantic music I've ever purchased and his lyrics aren't unrealistically sappy. He really tells a story with every song he sings. (And if you're single this Valentine's day, there're a few really great anti-love songs, like 'You Stood Me Up' and fun friend/party songs like 'I Went with some Friends to see the Flaming Lips'


Click here to find more of his songs (and you might be able to download a few of them by clicking on the blog links).

Wednesday, January 23, 2013

diy heart headphone cord wrap

I'm seeing Valentine's day in a completely different light this year. After scrolling through page after page of Valentine ideas (to get some inspiration), I realized something. Valentine's day has turned into yet another way for us to celebrate the men and children in our lives.

And you know what? That's wrong.

Let me explain. Don't men and kids have enough holidays to call their own already? Christmas, Easter, Father's day, Halloween, Thanksgiving (come on, you know this is for them, too. I don't hear men discussing turkey recipes every year). So what holidays does that leave us with -- the ladies? Mother's day? Thanks, Hallmark, but that still alienates a lot of us as you kinda gotta be a mother for that one.

So I'm taking back Valentine's day. If there's any event that should be 100% about celebrating the lady in your life, it should be this one. I've gotten a few diys ready for Valentine's day, but they are specifically for things that I would want or things that I need or that I like.

And that's where this little headphone cord wrap comes in. I was getting tired of finding my earbuds in a jumbled mess in the bottom of my bag and one thing I really wish had been included with my new iPod was the little headphone case that Idle Husband got with his iPad. It's a really nice way to keep and store earbuds, and I wanted to have something like this, too.

I spotted a tutorial for a gingerbread earphone cord keeper (which looks like a tiny way to adjust the cord length on earphones) and that's when inspiration struck. I just needed something bigger.


I used Crayola's air dry clay (which I've been using for so many projects lately). Just take a good chunk of it and roll it out flat. You don't want to roll it out too thin. The thickness needs to be pretty substantial to keep the heart flat while the clay dries and also to give it some strength. Remember, this is going to hold a wrapped cord and be floating around in your purse soon!

Grab a heart-shaped cookie cutter (or any cutter you want, really) and punch out the heart shape. Carefully remove the extra clay from around the heart.

{good to know} I almost always make more than one clay item when I'm working with this medium (you can see the extra hearts in the top photo). If anything should go wrong during any stage, I have a back-up. The drying process is a little time consuming and it really sucks to have to start all the way back at the beginning! (Besides, the extras I make usually serve as testers for paint colours or techniques and if they still turn out pretty good, they can also be gifts!)


Next use a straw or something similar to punch two holes into the sides of your heart. Punch them around the middle of the heart and kind of close to the sides. Just make sure to leave enough room at the bottom so there's enough of the heart stem left. You don't want that snapping off later!


Use a knife to cut out little notches that go into the holes you just created. This is where the cords will slip in.

Now you're going to want to let your heart dry at least overnight.


In the morning, grab a damp sponge and use it as a sanding tool to round the edges and buff off any sharp bits of clay.

I left mine to dry for another day after this sanding.

Once dry, you can paint it however you like or leave it plain. I used a watercolour paint for the pinkish red hue and I used an acrylic for the gold dip. Then seal the whole thing up with a coat of mod podge. (I definitely have to buy some more podge. Mine has glitter in it from the dinosaurs!)

Once everything is completely dried and cured, wrap your headphones around the heart and stuff it in your purse!

This is going to be so handy and it's exactly what I wanted! Thanks, me!

Friday, December 14, 2012

greek blues

We just returned from Greece! We had a sneaky little pre-Christmas holiday partly to avoid the Christmas travel crowds and save money, but also so Idle Husband could celebrate his name day in a country that really gives a damn about name days!

Every time we go, I find some sort of theme to my pictures and this year, I found myself taking a lot of photos of buildings and architecture, patterns and colours. So I arranged them according to colour (cuz I'm crazy that way).


Wednesday, September 19, 2012

creme brulee


I'm pretty sure I've never had crème brûlée up to this point, but, as most of my projects in food, this was a request from Idle Husband.

A few months back, he proclaimed his sweet love for creme brulee. I looked at him in disgust and cursed the restaurant that had this on its menu. He just had to go ordering the most finicky thing and then he just had to go loving it. How the heck would I pull something like that off? I'm going to have to get a torch? That's too much trouble, so just remember that dessert fondly cuz it's not coming out of this kitchen any time soon.

But before I knew it, I found myself trying to come up with birthday ideas and decided this had to be it. He'd forgotten all about creme brulee by that time and had stopped bringing it up at every meal. This would be the perfect surprise! And, yes, despite my annoyance, I'd track down a torch (they aren't too expensive at Home Sense and I printed a 10% off coupon. Just be sure to get butane and test it as they aren't prefilled) and even some real vanilla beans (another luxury I've refused myself to have. Too fancy! Too expensive! Too finicky!). This was a birthday treat, after all.


I assembled my ingredients and read through my recipe again, separated my eggs, measured out the cream and sugar, and... is that it? That's all? I didn't even have to lug out the KitchenAid? The entire project was too easy. Easier than a cake, actually. Maybe it's this recipe in particular, but I couldn't believe that by the time the cream had boiled, I was pretty well done.

My kitchen wasn't a disaster. I had used one bowl and a pot. The only issue I had was the bain marie but that was on account of having a too-small tea kettle, and I worried tremendously as I removed them from the oven as they seemed more wobbly than trembling in the centre as called for in the recipe.

Since creme brulee can sit in the fridge for up to three days, I made these a day in advance (without the sugar crust), and hid them in the bottom portion of the fridge (I can hide things practically in plain sight around here). They set up during this resting period, so I was no longer concerned about the wobble.


The torching is easy. Don't even worry about overdoing it. The burnt bits add a really nice caramel flavour. Just be sure to add a thin layer of sugar. I found that a thicker sugar top ruined my enjoyment of the custard (which reminds me of a very delicate vanilla pudding) since I had to crunch my way through each spoonful. A thin delicate layer gives just enough sugary crispness for texture. Also, save the vanilla bean and stick it in the sugar you're going to use to top the creme brulee. It's so delicious! I'm so sad this recipe made an uneven five ramekins for us. I want one last whole one for myself! But we shared it, even though I know we both felt the same way.

recipe from Alton Brown

Wednesday, April 18, 2012

dream decorating project

I don't know if I've ever mentioned it before, but my ultimate decorating fantasy (well, at the moment, anyway) is to redo Idle Husband's apartment in Athens.

There's nothing inherently wrong with the apartment or the furnishings. It would be perfectly acceptable if one person stayed there but now that I'm around, that apartment has become the most uncomfortable place ever in the history of ever.


I'll start in the bedroom which has really good bones, i.e. a built in closet. The furnishings include:
  • 1 hard-as-rock twin bed
  • 1 pretty useless desk covered in stuff
  • 1 pretty useless shelf with doors also full of stuff no one's using (duh useless!)


The living room/kitchen/dining room, again, has pretty good bones, i.e. the kitchen cabinets are nice and all along one wall. The furnishings include:
  • 1 probably too large tv stand and 1 older model tv
  • 1 six-seater dining room table
  • 4 extra large dining room chairs
  • 1 three seat sofa that (get this) converts into a twin bunk bed (a twin set of bunk beds! I discovered this after I insisted I had to know what it converted into after one particularly sleepless night)
  • there might be a couple side tables doing nothing but taking up space, too, I just can't seem to focus on the little details anymore

In theory, that doesn't sound so dismal, right? But when I tell you this apartment is 388 square feet and this stuff is literally squished into it, do you understand now?

Let me describe to you a typical stay there. Since the bedroom is pretty much useless to us (twin bed and all), we leave our suitcases in there and live out of them. I know, I said there's a super nice built-in closet? Well, there's stuff in there or no hangers... or some reason why we never use it.

Therefore, we find ourselves pulling out the sofa "mattresses" that are really just foam pads that are a part of the twin bunk bed shenanigans. They don't really function as a double mattress but, pushed together, they kind of work (except they always slide apart mid-night). There are no sheets, no comforters, no suitable pillows for some reason, just blankets, and the mattresses go straight on the floor in the kitchen (my layouts are not to scale, so, to answer your thought, no we can't put the mattress on the bedroom floor. There's not enough space). To give you an idea of space in the living area, once the mattresses are on the floor, in front of the sofa frame, the bottom of the mattress (i.e. where our feet are) wedges right up against the kitchen counters. That's the width of the whole living area.

Now we're wedged on the floor and we have to get up off the floor, go around the dining room chairs -- let's hope we remembered to push them in the night before so no one stubs their toe -- and each other (sad is the person close to the window wall), to access the bathroom (and as much as I don't want to admit it, the older you get, the harder it is to get up off the floor in the middle of the night).

Furthermore, the tv is on the other side of the dining room table, so we can either sit in upright dining room chairs to watch shows at night or we can lay on the floor and angle ourselves so we can watch tv through the dining room chair legs from our makeshift bed (since the couch is unusable with all of its cushions on the floor for sleeping -- not like it was usable for tv viewing before since it's not even facing in the direction of the tv -- it's too wide to be placed that way).

Sounds like a relaxing vacation, right? And the jet lag going to Greece is absolute murder (coming back is much easier on the system). We're usually so tired from the trip itself that all we want to do for the first day is sleep and these are the accommodations we're arriving to. It's better than the chairs at the airport but not by much.

So I have suggested many times that the most awesome gift Idle Husband's parents could ever give us would be to empty the apartment of all the furniture and stuff. They don't have to do anything else to it. Just empty it (cuz for the life of me I have no idea how they got that stuff in there in the first place).

Then I could do something like this:


With this stuff:

Everything is from IKEA since they make a lot of cheap furniture (this is definitely a project for a small budget) designed for small spaces like this (and it would be easy to get most of it up the spiral staircase or the tiny elevator).

I might go with a different sofa once at the store but I actually had this one when I lived in the NAIT apartment and I like that it's small and can convert into a small double bed (good for anyone else -- especially with kids -- who happens to stay at the apartment when we're not there) and it's relatively comfortable (couple of throw pillows would round it out). The splurge is really the dining room set. I could be talked into another, cheaper version, but I've always liked the look of that particular set plus I love that the chairs slide under the table like pieces of a puzzle which makes the whole set only as large as the table itself. I also chose a small laptop desk that would double as a side console and a room divider when placed behind the sofa. We'd be able to use it as a table for drinks etc. when sitting on the sofa, a sideboard for dining, and we could swing a chair over from the dining room set and use it as a desk as well (multi-functional!).

The final total doesn't include the price of a double mattress (and I would definitely agree to a cheaper IKEA mattress, too. Any actual mattress will do!), and the price of the curtains are included, but they're probably not necessary since I think the existing curtains were just fine -- I just wanted to add some nice cheery colour to my layout.


I would also use existing lighting and accessories, I just can't really remember what they were. If anything, these are the things that should be collected over time, here and there, so that's why I haven't included them. I would definitely use this as an excuse to drag Idle Husband to the Monastiraki flea market again! And despite my usual disgust with fake plants, I think some of the fakes IKEA offers would be really perfect for the place since they'd provide that necessary green life without having to worry about keeping them alive while no one is there (shown: house bamboo, succulent, maidenhair tree -- nothing with flowers because I find fake plants with flowers look... faker than a leafy plant. It's not about the design of the flowers, but the fact that your plant seems to always be flowering and that's not natural).


One final thing, the tiles in the apartment are amazing! They're a coppery browny orange and shiny like glass, so I think blues and greys would work the best in the space because of them. And I'm envisioning a blue-grey tone for the walls. Perhaps a feature wall in the living area to make the space appear wider and then carrying that tone into the bedroom as well.

Pretend decorating can be so much fun. Do you have any dream decorating projects that you'd love to make a reality some day?

Friday, April 13, 2012

friday fixation: tsoureki

I know it's strange, but this week is Greek Easter so on Monday we promptly (I have no idea how she manages to time the mail so well!) received our Greek Easter gifts. Among the treats, was a loaf of tsoureki (pronounced choo-wreck-ee). I'd never had it before and it fascinated me so much, I had to try some while Idle Husband was at work. He insisted he didn't like it and wouldn't even have a slice (while I insisted it was delicious and had a big pocket of chocolate inside), so (shamefully) I've been eating it all week long. There are a lot of recipes for the bread online, but it wouldn't surprise me if you found a loaf at the Italian market or Hellas Foods.


Now that he's seen the pictures, Idle Husband is really sad he missed out. I told him it was full of chocolate!!

Tuesday, November 15, 2011

black bean brownies with peanut butter chocolate chip "cookie dough"


I definitely don't make it a habit to trick Idle Husband into eating things he doesn't like (or says he doesn't like -- because there is a difference). Sometimes, I like to sneak that good stuff in. Spinach in chicken meatloaf, sweet potato "french fries", tomatoes and parsley in hamburgers, carrots in beef meatloaf. But I never lie about it. He knows it's there. He can see most of it. It's the fact that he can't taste it that's important.

And that's why this is my best food caper yet!


I never once mentioned that these brownies were made up almost entirely of black beans. Beans are one of his most hated food items.

We happily ate them for dessert for two weeks. And I happily discovered he was sneaking squares out at night, while I was asleep.

I didn't even have to disguise them with anything. I didn't put globs of icing on them. No whipped cream. No crumbled bacon. He himself didn't even add a blob of honey on top of each bite. They're just deliciously fudgey -- no. cakey! -- no. melt-in-your-mouth-y! They're just different in a really good way.

So except for the batch where I added a banana, I still haven't mentioned what makes up these brownies.


It was on the second batch where I thought I'd throw caution to the wind and test out a chocolate chip cookie dough dip that I'd had in my sights for a while. I thought it might work as a cute little topping. But like the black beans, chickpeas (another hated ingredient) were now going to substitute flour and butter.

The chocolate chip cookie dough experiment didn't go over as well with Idle Husband, but it went over well with me. I ate most of it with a spoon, straight out of the fridge.

Right now, I'm wishing I had another can of chickpeas just so I could have more in the fridge. It's so good. So. Good. It will frighten you how good it tastes. And how much like cookie chickpea becomes.

I think the only thing that kept Idle Husband from enjoying it was the name.

"But why eat cookie dough? Why not just bake it and eat cookies?"
"It's supposed to be like this. It's a cookie dough dip. It doesn't have eggs in it."

He couldn't get past it so that was the end of that conversation. I didn't want to tell him it was made from chickpeas and that I made it to go with the black bean brownies (and they go very well together) since I was still smug from successfully disguising beans and I wanted to sneak peas in, too.

It would have ruined it, you know? This surprise.

Oh yeah. Surprise!

{banana black bean brownies}
adapted from Amy Bites

1 (19 oz) can black beans, drained and thoroughly rinsed
3/4 cup sugar
1/4 cup cocoa powder
1 pinch salt
2 eggs
1 ripe banana
1 tsp vanilla
1 tsp instant coffee (optional)
nuts and chocolate chips as desired

Puree all of the ingredients (except nuts and chocolate chips) in a food processor, blender, or with an immersion blender (I used my immersion blender). Blend thoroughly until well combined and smooth (gotta get the bean chunks).

Pour batter into a well greased baking dish. I used two different sizes. One 5x6" and the other 11x7". The smaller the dish, the more cakey the outcome. We preferred the larger dish.

Top with nuts and chocolate chips if desired (or mix them in).

Bake at 350 degrees for 30 minutes or until the top is dry and slightly cracked and the edges have pulled away from the sides of the dish. Toothpick test. Let cool; slice and enjoy. (Lasts exceptionally well covered at room temperature.)

{note} Please please also visit Amy Bites for the original version of this recipe which is just as good as the banana version. Idle Husband preferred the banana; I liked the original.

{peanut butter chocolate chip cookie dough}

1 1/2 cups chickpeas, drained and rinsed (almost a full 19 oz can -- I should have just used the whole damn thing)
1/8 tsp salt
1/8 tsp baking soda
2 tsp vanilla extract
3 tblsp smooth peanut butter (I used Kraft Light)
2 tblsp (more or less) milk (I used almond)
2 1/2 tsp Splenda
chocolate chips

Puree the first 5 ingredients together in a food processor or with an immersion blender. Blend thoroughly until well combined and all of the chickpeas have been pureed (it would shatter the mystique if you found a little chickpea chunk in there). Add the milk a tablespoon at a time until you reach your desired consistency (mine was a little more like dough than dip; add more milk if you want to dip into it). Add the sugar one teaspoon at a time until you reach your desired sweetness.

Mix in however many chocolate chips you desire (chopped chocolate would be nice, too). Enjoy! (Store in the fridge in a covered container.)

{note} Please please also visit Chocolate Covered Katie for more ideas on variations of the dip and sweeteners to use (she's also got a whole lot more sugar-free and gluten-free desserts. I really love her for that).

Friday, October 14, 2011

friday fixations: thrift edition


One of the best parts of the vacation? Thrift shopping! You know I love a good thrift store. So here are some of the things I picked up:

{1 owl salt and pepper shakers} I still feel like I paid too much for these ($10 is too much, right?), but they're owls and they're salt and pepper shakers and they're cute! I just couldn't let some other person get them, I just couldn't.

{2 glass water decanters} I was literally paying for stuff when mom came running over with these bottles. They're both different shades of purple and they've got glass stoppers. I think I'd like to use them bedside. I think. I'm still not sure.

{3 little cubby of painted ceramic drawers} I really don't know what I'm going to use this for, but it seemed too handy to pass up. Currently, I'm leaning more towards using it for jewelry storage but it could also go in the kitchen or in the craft room. The wood is in pretty bad shape, so I'm planning on painting that portion. It's kinda hard to tell by the photo, but I've already filled in cracks with wood filler and given it a quick sanding. (I had that stuff out so I wanted to do it all at the same time, and then I thought, wait I haven't taken pictures of the before yet! Stop the presses!) Ah, question. Should I paint it white or yellow? I have both. I'll probably make the decision once I see it primed.

{4 jewelry boxes} I mentioned it in a friday fixation post and I'll mention it again: I'm gaga for jewelry boxes now. I'm still using my little frame and doily jewelry hangers, but I'm tired of them. They're nice. They work great. But I'm just really sick of seeing all of my junk hanging there. The two larger boxes need a good scrubbing and I'm going to fix up the wooden one a little. Hopefully I can figure out how to change the fabric top on it. I'm not 100% keen on the floral couch-like fabric. The small one is another suede travelling jewelry holder which almost makes up for the one the thrift store took away from me a couple weeks ago. It's newer, but it's in better shape (I have to do some searching on how to clean that suede/velvet type of fabric).

{5 lettuce shaped serving bowl} I think this little ceramic lidded bowl is the cutest! Maybe it's not lettuce. Maybe it's a cabbage? Whatever. I really want to serve some vegetables in it (preferably brussel sprouts).

{6 more decorative tins} Two have hinges! I can't pass up a tin with hinges! The other two, well, I just liked them and it's been ages since I've allowed myself to even look in the tin section let alone buy anything from it. Besides, it's winter. That means it's time to display them. I got a little excited.

And then there's this:


It's a headboard! You know those old ones with the drawers? My gram used to have them at her summer cabin and I always thought they were the best. You could hide all sorts of stuff behind the doors and the top is wide enough for lamps and books, too. I think it's the most useful headboard ever designed.

So when I started to notice that someone needs a little more storage for things such as cords and phones, I thought this would be the perfect solution. Would you believe we got it for $15?! (This and the footboard, but I don't plan on using that part.)

I've painted it already and I'm going to drill a hole in the back (behind the doors) for cables to slip in, then everything can be closed and hidden so our room has that nice, neat, and orderly look while still providing the necessary space for gadgets and doodads. I'll definitely do a before and after post once I finish it up completely. I'm already totally in love with how it looks after painting. What a difference from the photo!

Friday, July 22, 2011

friday fixations

{garden centres} Shop for plants instead of pants, that's what I always say (actually, I never say that, I just thought it would be funny. Cuz pant shopping sucks so hard, right?) Slowly, slowly everything is starting to go on sale or clearance and going to all the garden centres is at the top of my mind. This week, I found various shades of pink and white peonies, pink tiger lilies (I've been looking for pink all summer), coral bells (the foliage on these is an amazing shade of pink), delphiniums (I don't know what colour these will be -- probably blue -- I was just excited to find some for only a buck each), pink oriental poppies (excited!), a pink day lily, and lambs ears (I love their silver colour but really. Who doesn't love a plant that's stroke-ably soft?). I'm planting up a storm in the front yard and in case you couldn't tell, I want a lot of pink out there.


embarrassing fact: this is our favourite dance song (and has become a fixation of its own)
{kinect dancing} We waited a long time to get the Kinect. We thought about how many times we used the Wii to excercise or play tennis or how often we actually set up the Dance Dance Revolution mat and played that game. And when it came right down to it, we just didn't think the Kinect was worth it. Enter the Greek parents. Wouldn't it be fun to get the Kinect and make them dance with it?! Duh! So we got it and had a lot of fun with it, but I didn't really properly try it until after they left. Now that I've played Dance Central a few times, I'm totally hooked. It's awesome! I couldn't coordinate my leg movements to the arrows and watch the screen for instructions on Dance Dance Revolution, so I really couldn't manage to get through one song without becoming frustrated. I kinda thought my dancing skills on this would be the same, but I'm managing the routines really well. They run through the moves with you for each skill level (and you can slow it down if you need to), then you mirror the lead dancer (which I find a little easier on the brain). And since this game incorporates arm movements and actually takes note of whether you bent your knees for a move (cheaters beware!), it's turned out to be a really great workout. A workout that's so much fun, I really don't notice I've been dancing for an hour (aside from the fact that I'm a lot sweatier by the end). I could do without the freestyle addition because it makes me feel even dumber than I already do, but I guess that's the whole point to most of these games, isn't it? That and finally destroying your husband at a video game! (See previous cheater note.)

Source: purlbee.com via Idle on Pinterest
{neon colours} I've never been all that attracted to neons before, but lately, I'm really liking how they look when paired with muted greys or muted shades of the same neon tone. Nothing really says summer quite like neon, right? Although, I am thinking I need to find some neon felt to make a spectacularly bright flower to pin on my winter jacket this year. And I really liked the little every day touches of neon in this post at decor8, too. That's what I'm talking about. (Also pictured: my insane friendship bracelet fixation rearing its ugly head again.)

Strawberries
{strawberries} And using the tip of my vegetable peeler to core them. Why didn't I think of doing that before? Duh.

{patterned walls} I don't know if I want to tackle a wallpaper job, tape up some stripes, or make my own stencil, but I'm really thinking about patterned walls lately. Plain paint just isn't inspiring me anymore.

Monday, July 4, 2011

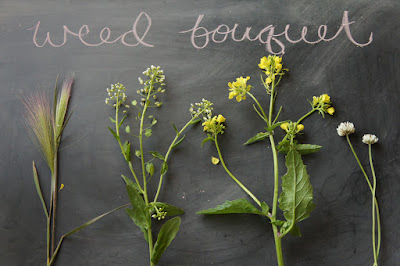
weed bouquets

My mother-in-law used to be a florist, so we've really been bonding over flowers and talking about the garden. In fact, most of our outings since the Greeks have arrived have been to greenhouses and garden centers. Which is almost like the most perfect time spent (in my opinion).

Every night, they go for a walk and almost every night, she returns with some sort of bouquet of weeds and grasses she picked as she walked.

It reminded me of this one bouquet I put together when I was a kid (mini tangent! when you're a kid you don't have this idea of what's right to do and what's not. You do what you think is pretty -- which is why I believe everyone can draw and everyone's an artist. It's society telling us that that's not a drawing of a horse). The bouquet was composed of all the different seed pods I could find in the yard in the fall and it was literally the best arrangement I think I've ever put together. It started in the vase green and it was kept well past the stems turning yellow.

I think that in the process of growing up, I might have forgotten that you can make a pretty bouquet out of anything you find. You don't have to have a lilac bush (or one to steal from) and you don't have to have a yard of cutting flowers, you just have to see the beauty in everything around you and you'll most definitely stumble on a cluster of flowers that will cheer up your kitchen just as easily as a bunch of expensive florist flowers.


roses aren't technically a weed, but in Alberta these grow wild in the ditches and are still found flowers


I wish I knew what this is. I love its lacy quality


don't forget about berries! we found this on a walk in Queen Elizabeth Park