
It is -44 -42 C today, so to decrease my stir-crazies (because I have barely breathed in any fresh air this week), I finally recovered

this chair

which had a huge rip in the corner of the fabric

but I really loved the fabric because I thought it was original and I just couldn't part with it.
But I had to part with it because this chair is hard as a rock. It was time to put some padding on it. And hell. It's -42. I opened the curtains at 10 to keep the window-cold out just a little bit longer. What else am I supposed to do? Vacuum or something? Pssh. (yeah ok, I vacuumed a bit.)
So get on your full body long johns, brew some tea, and read what I did:

First, I had to rip off that SOB fabric. It was a nightmare. So, like, I start pondering, "Am I so desperate for stuff to do that I really need to fix this chair right now?" I made some tea. I came back ready for round 2 of swearing.
Then I marked out the size of the seat on a new piece of foam. I randomly found this brand new piece at the thrift store for $1.99 (it was still in the plastic bag). I'm sure you can find this stuff at any fabric store, though. This is also proof that I've been meaning to get on this task for quite a while now.

I traced it. Boom. Chair seat outline. If your foam has a definite top and bottom, make sure you've lined up the seat so the foam sits on it properly, but like, don't stress about it. I wish I hadn't stressed about this so much (you'll see why later). Then I used plain ol' scissors to cut it, but a sharp serrated knife would have worked just as well, too.

I added some batting to soften out the foam (mine has that egg carton look on top -- foreshadowing. I'm doing it) and because what the hell, I've got some. Then I figured out (read: eyeballed) how much vinyl I'd need. It's like wrapping a present (which I'm not really that great at anyway). Or half wrapping a present as you're not going to cover the bottom of the seat with fabric.

I started by stapling the large edges by pulling the fabric as tight as I could and stapling it down. I really wanted to have a nice neat line of staples along the edge, but the wood was like cement over there and no amount of pushing and hammering (or constant swearing) could get a staple into it. Oh well. Put them in further. No big whoop. No one's going to see it.

To get a nice corner, I trimmed some of the extra fabric (not too much! I just cut enough to help with folding. Always opt for too little than too much). Then I pulled the middle corner tab up towards the centre, pulled it tight, and stapled it in. After the middle point is stapled in place, the corners are really easy to fold neatly in so you can staple the whole mess down (one corner at a time, please). There are a lot of ways to do chair corners, so if this isn't working for you, just do it the best you can so it looks neat from the top. Now trim off the rest of the excess fabric.
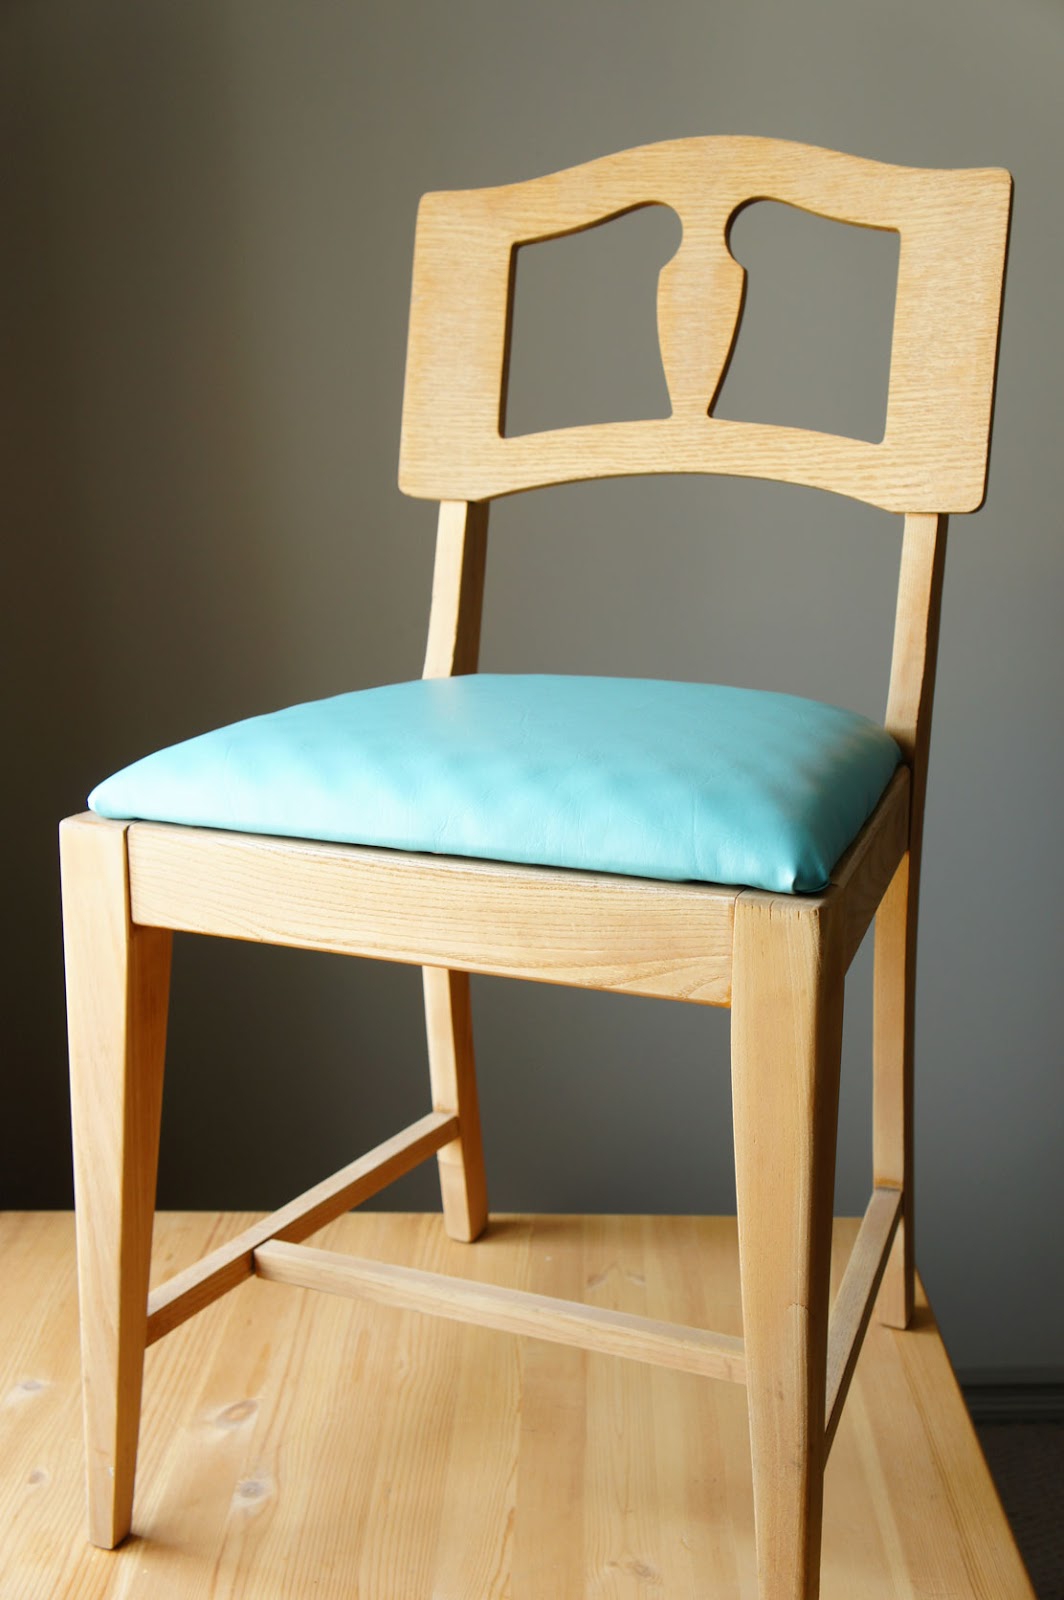
This seat just sits on top of the frame (no screws required -- shouldn't they be required?), so all I had to do was place the seat back on the chair frame, and voila! It's like getting a brand new chair! Pretty easy, right?

Now here's the part I kind of regret. Since the foam had texture, for some reason I can't explain, I figured it should face up. But despite the batting, I can still see the bumpy egg carton texture. So if I were going to do this again (and I'll be doing it again for the chair I'm sitting on right now -- but that's for some other -42 day), I would make sure that bumpy foam was facing down so the top was smooth. Not that it's a big deal, mind you. It's not terrible (especially since this chair lives in my craft room), but I would prefer it to be smooth. It's just something to think about if you're using egg carton foam, too. Anyway thanks to that egg carton foam, the chair is super squishy and soft now so I can finally do proper crafts in comfort.
Way back when I got this chair, mom spent forever and a half stripping it down to its natural colour which is why I haven't painted it. Now I'm wondering if I should or is that just the sitr-crazies talking. Thoughts?

6 comments:
Live and learn, next time you'll know what to do when it comes to textured foam. FWIW it still looks all right :)
Stay warm! It's only a chilly -35C here today, but brrr -42C is madness!
ahh you make it look so easy!! it really changes the chair and makes it new again. love the color you chose!
love it!! Very inspiring
I like the chair unpainted.
You did a great job! Now I'm going to be out looking for cool chairs so I can copy you :)
I'm slowly recovering our dining room chairs. It never occurred to me to add foam with my batting. I'm definitely going to add some to my next chair - whenever I get around to it.
I like your chair as is!
I have a few chairs at home in desperate need of some serious recovering ;) thanx for inspiration x
Post a Comment